В четвертой части нашей статьи речь пойдет о заключительных мероприятиях по сборке и окраске куклы.In the fourth part of our article will discuss the final arrangements for the assembly and painting of the dolls.
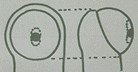
Соединительные углубленияConnecting deepening
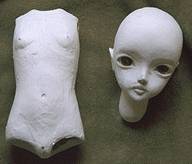
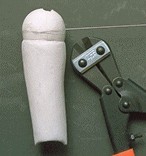
Используя stoneclay Using stoneclayсделайте голову и тело гладкими make the head and body smooth
Залепите дырочки stoneclay ' ем, затем продавите углубление соединительным шариком, накрытым пленкой. Slapped holes stoneclay 'it, then selling the deepening of connecting ball, covered with foil.Удалите излишки stonaclay Remove excess stonaclayпо краям. the edges.
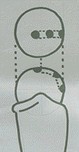
Отверстия для соединенияOpenings for connection
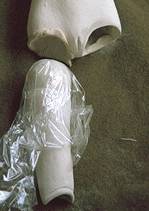
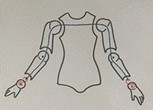
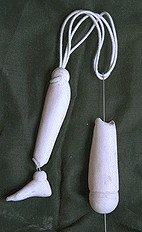
Теперь будем сверлить дырочки в соединениях. Now we're going to drill holes in the joints.В обеих ногах эластичная веревка будет идти от лодыжки вверх, через отверстия в коленях, в бедрах, к голове. In both legs, elastic cord will go from the ankles up through the holes in the knees, hips, to the head.Для рук веревка прикрепляется крючком внутри запястья. For the hands of the rope is attached a hook inside the wrist.Она проходит внутри обеих рук и закрепляется на втором запястье. She goes inside of both arms and fastened to the second wrist.
Просверлим три дырочки в местах соединения локтя, колена и бедра, придав им немного вытянутую форму. Drill three holes in the joints of the elbows, knees and hips, giving them a slightly elongated shape.
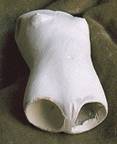
Так же просверлим дырочки в центре шеи, запястья и лодыжки Just drilled a hole in the center of the neck, wrists and ankles
Для плечевых соединений делаем отверстие в центре и тоже делам их более вытянутыми. For the shoulder joints make a hole in the center and also for their more elongated.
Струнная проволокаString wire
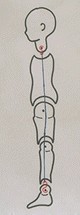
Просверлите отверстия в местах соединения шеи, локтей, бедер, коленей, лодыжек. Drill holes in the neck, elbows, hips, knees, ankles.Протяните струнную проволоку внутри делателей через сделанные отверстия и закрепите концы, используя stoneclay . Hold stringed wire inside the laborers are made through the holes and fasten the ends, using stoneclay.
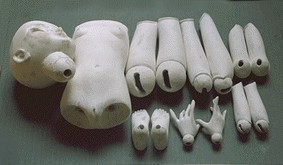
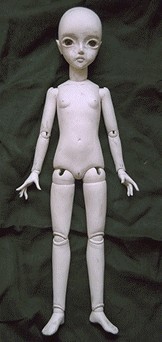
Все части готовы! All parts are ready!
Временное соединение.Temporary connection.
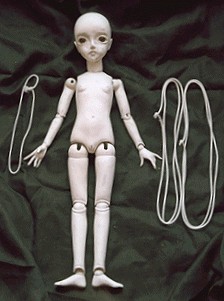
Теперь временно соединим все части, чтобы проверить соразмерность деталей. Now temporarily put all the pieces to check the proportionality of parts.Длина и растяжимость нити зависит от конкретной куклы. The length and extensibility of the threads depends on the dolls.Для ног лучше взять две петли резинки, длиной от лодыжек до шеи, для рук – от запястья до запястья. For legs better to take two elastic loops, ranging in length from ankle to neck, hand - from wrist to wrist.
Используя изогнутую прочную проволоку протяните петли через все отверстия и прикрепите каждый конец к крючку. Using a curved solid wire stretch loops through all the holes and attach each end to a hook.
Зафиксируйте все части и проверьте плавность сгибания всех суставов. Fix the all parts and check the smoothness of flexion of all joints.Резинка не должна быть натянута слишком слабо. Eraser should not be stretched too weak.
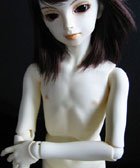
ГрунтовкаPrimer
После проверки куклы в собранном состоянии разберите ее, загрунтуйте и покрасьте все детали, а затем соберите снова. After checking the dolls in the assembled state disassemble it, zagruntuyte and paint all the details, and then build again.
По материалам www2d.biglobe.ne.jpOn materials www2d.biglobe.ne.jp


 Библиотека : Куклы Library: Dolls