

|
|
|
|
News |
Articles |
Recipes |
Dream book |
Daily Horoscope |
Magazines |
Galleries |
Books
|
Needlework | |
||
|
|
|
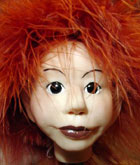 Библиотека : Куклы Library: Dolls Библиотека : Куклы Library: Dolls Лепка головы Modeling headВ этой статье, адресованной начинающим долмейкерам, вы найдете информацию о том, как слепить голову куклы из fimo. In this article, addressed to beginners dolmeykeram, you will find information on how to slap his head dolls from fimo.Начнем с того, что сделаем каркас головы из алюминиевой фольги. To begin with, that will frame the head of aluminum foil. Для этого отрежем квадратный кусок фольги, и соберем уголки квадрата вместе, образуя форму парашюта. To do this, cut off a square piece of foil, and gather the corners of the square together, forming the shape of a parachute. «Парашют» размещаем на конце стержня для лепки, и сминая фольгу, формируем овал головы и шею. "Parachute" is placed at the end of the rod for modeling, and crushing the foil, forming an oval head and neck. 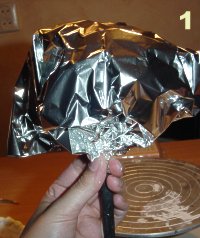  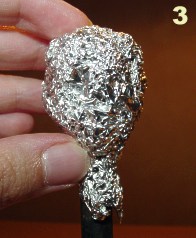 Разомнем в руках кусочек фимо, так чтобы с ним можно было работать. Mash in the hands of a piece of Fimo, so that with him could work. И затем покроем им равномерно алюминиевое ядро головы так, что она была плоской со стороны лица. And then they uniformly cover the aluminum core of the head so that it was flat from the person. Чтобы разместить на поверхности лица стеклянные глаза, наметим их расположение. To place a person on the surface of glass eyes, outline their position. Обычно они располагаются чуть выше середины лица. Usually they are located just above the middle of the face. Проведем горизонтальную линию на уровне расположения глаз и вдавим глаза в пластик. Draw a horizontal line at the location of the eyes and pressed his eyes in the plastic. Теперь возьмем два небольших кусочка пластика для верхних век, раскатаем их между ладонями и немножко сплющим. Now take two small pieces of plastic for the upper eyelid, roll them between your palms and slightly flattened. Получившуюся форму размещаем над глазами, как на рисунке 6. Received the forms is placed over the eyes, as in Figure 6. 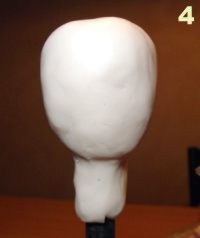  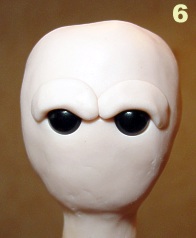 Затем следует хорошо загладить швы. Then follows a well atone seams. По возможности старайтесь заглаживать пальцами, потому что тепло рук делает материал более податливым. If possible, try to wipe out your fingers, because the warmth of hands makes the material more pliable. Кроме того, для заглаживания швов можно использовать стек. In addition, mitigation of stitches you can use the stack. Не следует заглаживать швы по направлению к глазу. You should not wipe out the seams in the direction of the eye. Нижние веки делаются точно так же как и верхние. Lower eyelids are done exactly the same as the upper. 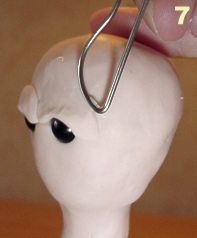 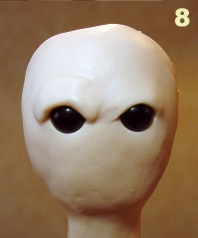 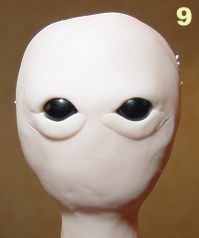 После того как вы сделали и хорошо загладили веки, можно приступить к созданию формы лица. Once you have done well and made amends for ever, you can create face shape. Вылепите форму для лба как на рисунке 11 и поместите ее на лоб. Mold form to the forehead as in Figure 11 and place it on the forehead. Другой подобный кусок поместите на нижнюю часть лица. Another similar piece put on the lower part of the face. Всё следует хорошо прикрепить, и разгладить пластик. All should be well attached, and smooth plastic. При разглаживании старайтесь не задевать глаза! When smoothing try not to offend the eye! 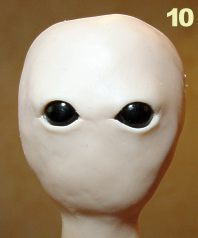  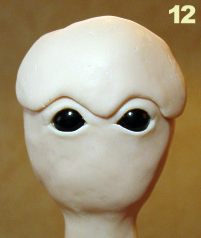 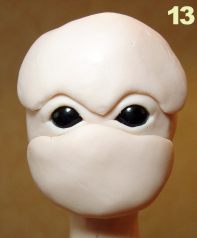  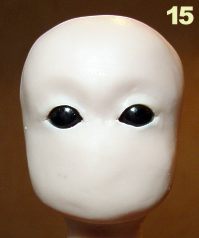 Далее возьмите небольшой кусок пластика для носа. Then take a small piece of plastic for the nose. Лучше взять немного больше, чем требуется, так как намного проще удалить излишки материала, чем добавлять недостающее. It is better to take a little longer than necessary, since much easier to remove excess material than to add the missing. Слепите из куска примерную форму носа и прилепите к голове. Blind from a piece of the approximate shape of the nose and cleave to his head. Посмотрите на фигуру с разных сторон, чтобы убедится в соответствии выбранной форме носа лицу. Look at the figure from various angles to make sure that under the chosen form of the nose face. 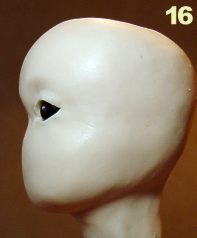 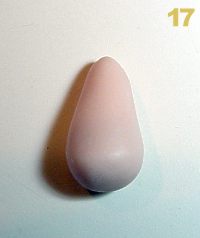  И снова нужно загладить швы. And again to smooth over the seams. Начинать заглаживать лучше в области между глаз по направлению от них. Starting wipe out better in the area between the eyes in the direction from them. После заглаживания швов пальцами придайте носу подходящую форму и разгладьте поверхность. After remedying stitches fingers Give the correct form of the nose and smooth the surface. 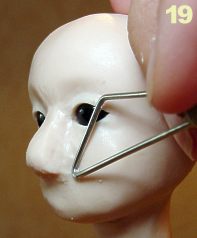 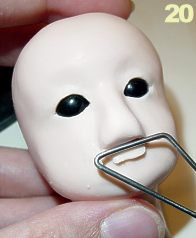 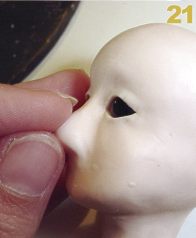 Используя круглую деревянную палочку сделайте ноздри. Using a round wooden stick make the nostrils. 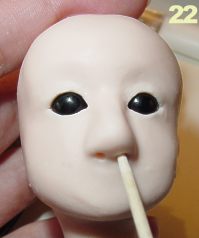 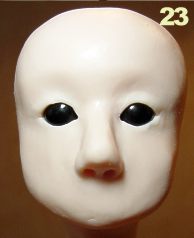 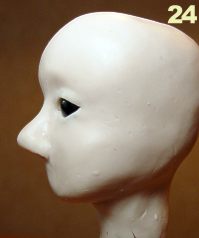 Теперь перейдем к губам. Now to my lips. Начнем с верхней. Let's start with the top. Для этого нужно скатать колбаску из кусочка фимо и немного сплющить ее, после чего прикрепить под носом. To do this, sausage roll from a piece of Fimo and slightly flatten it, then attach the nose. Стеком загладьте швы и придайте верхней губе необходимую форму. The stack is zagladte seams and gives the upper lip required form. Разгладьте поверхность влажным пальцем. Smooth surface with a damp finger. 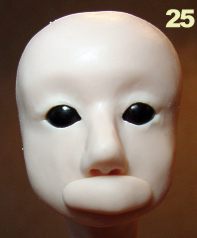 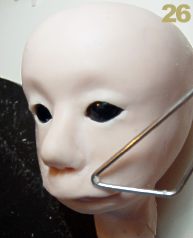 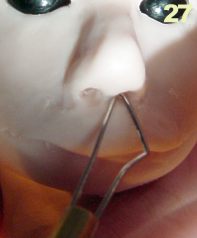 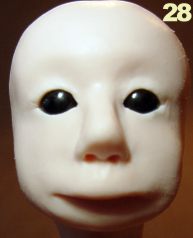 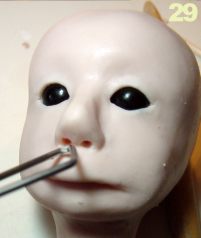 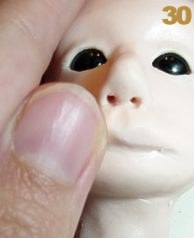 Деревянным стеком немного вдавите фимо под верхней губой для того, чтобы в это углубление поместить нижнюю губу. Wooden stack a little push Fimo under the upper lip to a deeper place in the lower lip. Снова скатайте колбасу и поместите ее в углубление, загладьте швы и придайте губе необходимую форму. Again, roll the sausage and put it in a hollow zagladte seams and makes the necessary lip shape. Затем добавьте немного пластика для образования щек. Then add a bit of plastic to form the cheeks. Посмотрите на голову с разных сторон, скорректируйте линию челюсти, убедитесь, что все неровности хорошо заглажены. Look at his head from different angles, adjust the jaw line, make sure that all irregularities are well smoothed. Затылок может получиться немного плоским, так что вы можете добавить туда еще немного пластика для образования правдоподобной формы головы. Nape can turn out a little flat, so that you can add there some more plastic to form a plausible form of the head. 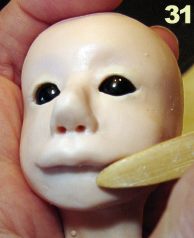 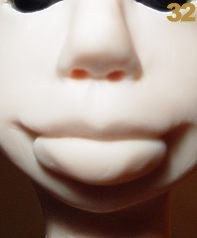 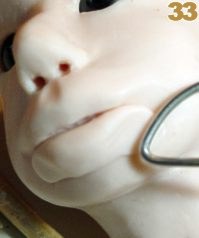 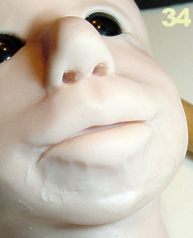  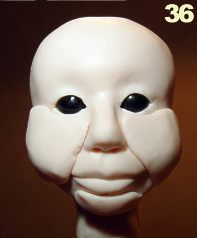 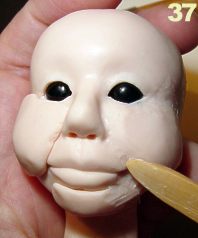 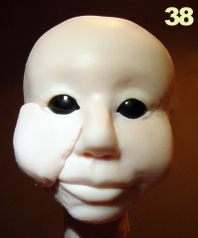 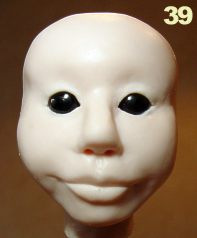 Теперь перейдем к ушам. Now to the ears. Скатайте 2 одинаковых шарика подходящего размера, а затем сплющите их и придайте им треугольную форму, после чего отрежьте по одному углу от каждого треугольника. Roll 2 identical balls of suitable size and then flatten them and give them a triangular shape, then cut off one corner of each triangle. Теперь прикрепите уши к голове, загладьте стеком швы и придайте ушам необходимую форму. Now attach the ears to the head, zagladte stack seams and gives the necessary form ears. 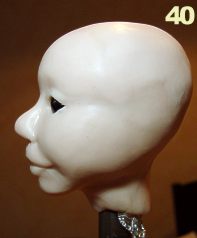 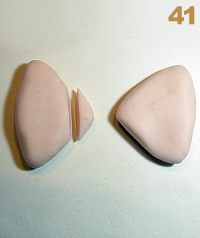 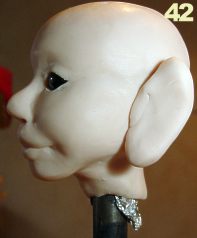 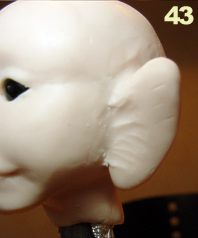 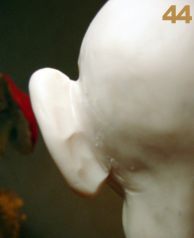 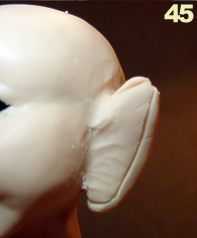 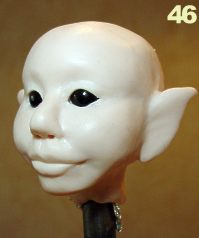 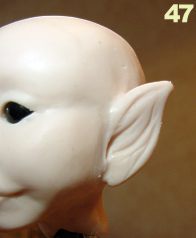 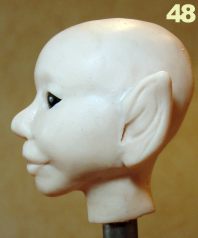 Теперь снова оглядите голову со всех сторон, чтобы убедится, что все сделано верно, и все неровности заглажены. Now head would look back on all sides to make sure that everything is done right, and all bumps smoothed. Если вам все нравится, запеките голову в духовке при температуре, указанной на упаковке материала. If you all like it, bake the head in an oven at a temperature specified on the packaging material. Внимательно следите за тем, чтобы температура в духовке была именно такой, которая требуется для запекания. Pay close attention to the fact that the temperature in the oven was just that, which is required for baking. В этих целях лучше использовать специальный термометр. To this end, better to use a special thermometer. После запекания старайтесь не трогать скульптуру до полного остывания, иначе она может потрескаться. After baking, try not to touch the sculpture to complete cooling, otherwise it may crack. 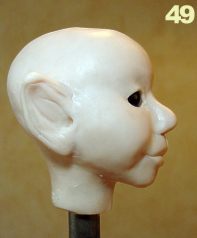 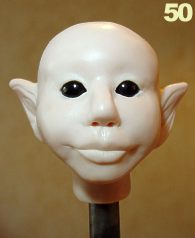 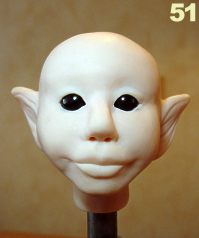 Теперь голову можно расписать акриловыми красками, и сделать парик. Now the head can be painted with acrylic paints and make a wig. В данном случае для парика было использовано боа. In this case, the wig was used boas. 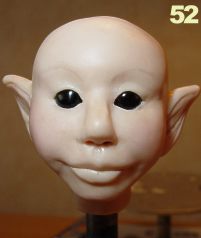 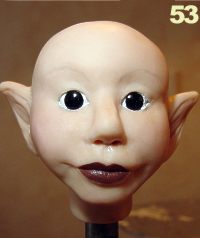 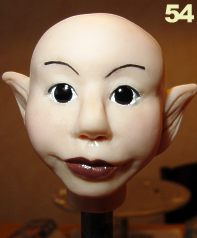 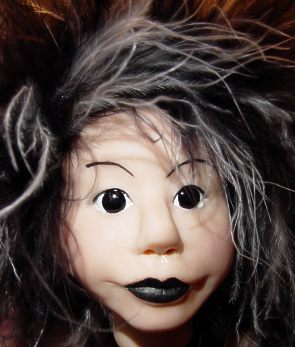 По материалам members.home.nl On materials members.home.nl pani.kiev.ua pani.kiev.ua
Свежие статьи в рубрике «Куклы»: Художественный проект КУКЛЫ МИРА , Мастер-класс. Fresh articles in the category "Dolls": art project DOLLS OF THE WORLD, Master Class. Изготовление летней феечки , "Кума 2013" , Стадии лепки тела куклы , Лепка «японской» куклы на шарнирах , Мастер-класс: Изготовление подвижной в “суставах” куклы из фарфора методом литья в гипсовые формы , Культура и искусство Японии , Куклы – это серьезно? , Мастер-класс Натальи Горбуновой , Кукла на шарнирах. Production year feechki, "Kuma 2013, Stages of body sculpting dolls, Molding" Japanese "doll on hinges, Master Class: The Making of a mobile" joints "dolls from porcelain by casting in plaster molds, Art and Culture of Japan, Dolls - this is serious ?, Master Class Natalia Gorbunova, Doll on hinges. Часть 4 Part 4 |
|
||||||||||||||||||||||||||||||||||||||||||||||||||||
 |
© 2004-2024 Fimo master class|master class on the modeling of the head|books on modeling from fimo|Женский журнал. Статьи, рецепты, сонник, гороскоп, женские, журналы, женские сайты, красота, женское здоровье, мода. Journal of the modern woman Pani.kiev.ua , reprint of materials allowed only with the immediate link to / at mandatory notification editorial on e-mail. Editor project For general and administrative questions, please contact |